Since Inktober was set to start on 1 Oct. I was going to use this Canson Mixed Media journal (6" x 8.5"), but the wire spiral gets in the way. If only I could bind single sheets using a Coptic stitch to bind the book. Enter YouTube and Sea Lemon and her Single Sheet Bookbinding Tutorial.

I removed the wire from the journal. The advantage would be I wouldn't have to punch holes in the paper or the cover.
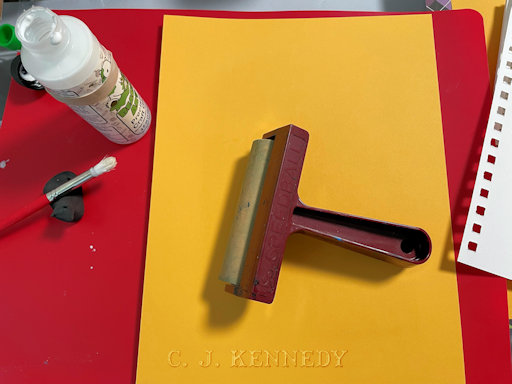
I covered the cardboard cover with cover stock. I used a white PVA glue and a brayer to make sure everything stuck down tight.

Corners were mitered and the edges glued down.

Decorative paper was cut to size and glued to the inside covers

Sea Lemon used clear packing tape along the sewing edge of her pages to make the pages studier and to hold up to the stitching. The packing tape I had was too wide so I thought I could use Reinforcements instead.
The binding in the tutorial had 6 sewing stations (3 on each end). I thought that might not be sturdy enough so decided on 8 sewing stations (4 on each end.) I stuck the reinforcements on the front side of the page. I had hoped I would have enough to do all 18 sheets of paper, but

I ran out of reinforcements so the last couple of pages I used some Washi tape. Not the neatest way to handle things, but the book is for me and will be functional for my needs.

The Young One had some colored crochet thread (size 8 or 10. Note the smaller the number for crochet thread, the finer the thread is) I only had 4 book binder's needles so would have to change needles to sew all 8 stations.

Sewing can be done with the straight bookbinder's needle, but it is sometimes difficult to maneuver between the pages to make the chain stitch. The Young One had a curved needle, but only 1 curved needle so the process was incredibly slow.
I used about 4 yards of thread. The thread was not waxed. In Coptic stitch (that is any binding that has exposed stitching) workshop I took a couple of years ago, the instructor cautioned using waxed thread in a climate where it can get hot and humid as the wax could melt and stain the book pages.
In hindsight, I wouldn't have used such long pieces of thread. The thread kept tangling, and I spent more time undoing knots. I also ordered 8 curved needles for next time.

To decorate the front cover, I had some Halloween themed scrapbook paper. One of the pages had cutouts. They were cute, but of course I had to decorate my book with a black cat. Fortunately the Halloween paper was decorated on both sides and the reverse side was plain. No spiders, or skulls.

Stitching completed outside and

inside.

The cover was decorated.
I like how you did this. You took something any of us could have and use and made it your own. I like the Halloween feel too. I think today I need to do some more Halloween art. And maybe put out my decorations too. Happy Monday. Stay dry. Sounds like a gloomy couple of days ahead.
ReplyDeleteA gloomy start to the week, but perfect weather for making art, especially Halloween art
DeleteFabulous album, you have lots of patience! Have a great week, Valerie
ReplyDeleteYou should have heard some of the expressions flying around the room while I was untangling thread. 🎃
DeleteWell done 👍🏻
ReplyDeleteThat took a lot of doing. I like how you took the book you had and re-worked it in such an attractive (and more functional) way.
ReplyDeleteIt does look a lot nicer and now the wire spiral isn't in my way when working in the journal
DeleteThank you for sharing! I'm always looking for single sheet binding ideas! :D
ReplyDeleteGo to YouTube and check out Sea Lemon. She has lots of different bookbinding techniques and her tutorials are easy to follow.
DeleteAll i can say is amazing! Looks like a lot of work. I love the one you made me.
ReplyDeleteIt is a lot of work, but the results are worth it. I'm glad you are enjoying the journal I made for you.
DeleteWhat a labor intensive, yet amazing book you created, CJ. I'm loving the inside covers and the way you used some of the same argyle paper on the outside. This is totally worth all the effort you put into it, and I love how you finished it with such attention to detail.
ReplyDeleteIt's nice to have a pretty journal to work in.
Deletecj; oh em cod how cool is this !!! well done :)♥♥
ReplyDeleteink....wavez two ewe up ther buddy....happee ink tober ♥♥♥
Thanks. Ink wavez back.
DeleteGreat redo of your MM journal. I like your thought processes and changes. Fun! Now to fill it...
ReplyDeleteI just hope I remember the problems/issues I had if I ever do it again
DeleteThat looks a lot of work!
ReplyDeleteIt looks good though, you must be pleased.
All the best Jan
It's nice to be able to work in the journal without that wire binding
DeleteNow That So Kicks A$$ - Good On You - Big Hugs
ReplyDeleteCheers
🎃 Thanks, Padre
DeleteWow CJ!!!!
ReplyDelete